網頁設計第四堂課:建立網站
Lesson 4
類別:網頁設計
為了將撰寫好的網頁分享給大家,使大家能在線上看到你的作品,我們需將網頁發佈至網路上。
此處我們將分享使用GitHub建立一個免費的網站。
GitHub的連結如右:
https://github.com/
建立GitHub帳號步驟如下:
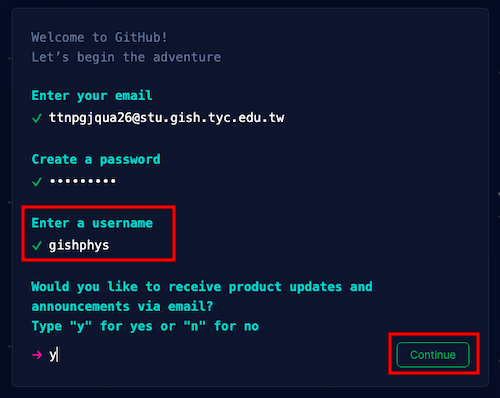
Step1、進到GitHub首頁後,點繫右上角Sign up建立帳號。

Step2、依其指示,輸入電子信箱email、密碼password、使用者名稱username、是否收取GitHub新資訊。
此處的username將會是你網站的名稱,其會出現在網址上,因此請想清楚建立的網站內容為何,為其設定一個較理想的名字。
完成後,按右下角的Continue。
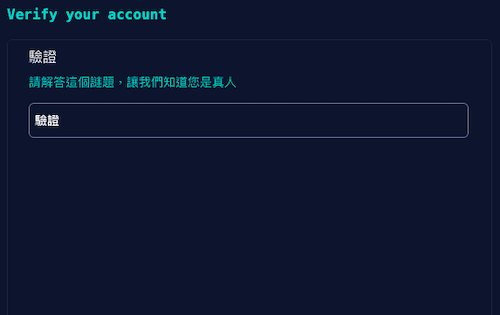
Step3、進行真人驗證。
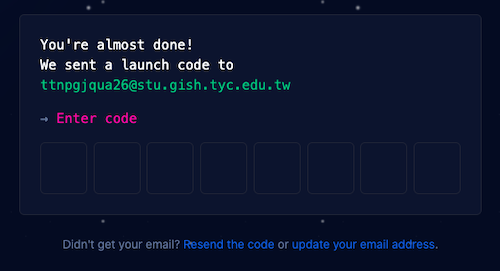
Step4、至電子信箱收驗證碼,並於此輸入驗證碼。
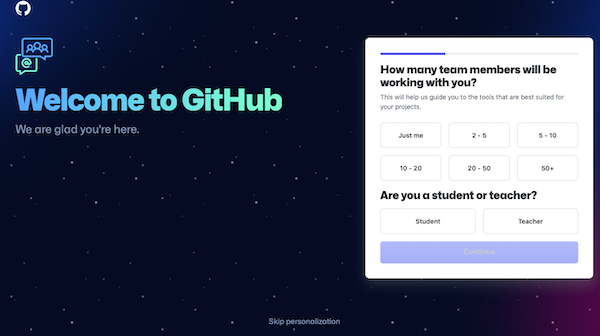
Step5、工作團隊人數選擇及身分選擇。
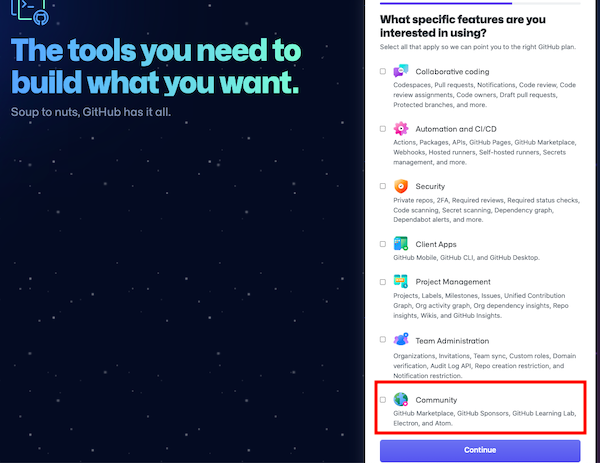
Step6、想透過GitHub建立什麼?我們要建立網頁,因此此處選擇Community。
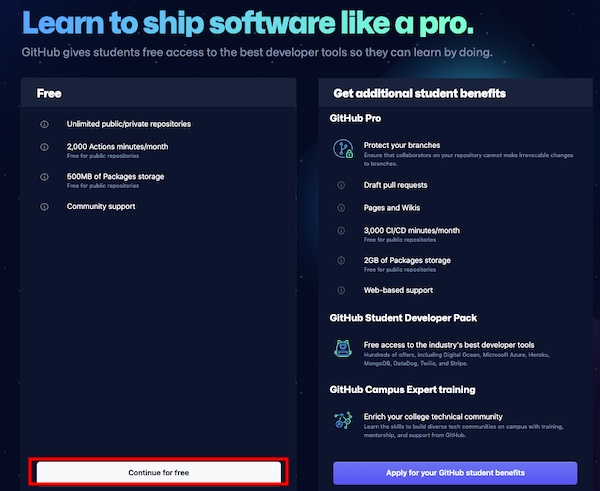
Step7、我們先選擇free免費版本,若未來有相關需求,可更改為Pro版以使用更多功能。
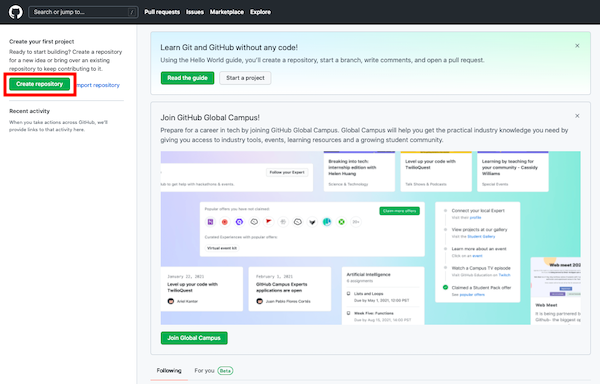
此時我們已經擁有GitHub帳號來建立專案或網頁,以下將說明如何將寫好的網頁上傳至 GitHub,讓大家能線上觀看。
Step1、建立好帳號後,進入GitHub的頁面如下,先點繫左上角的Create Repositoriy建立儲存空間。
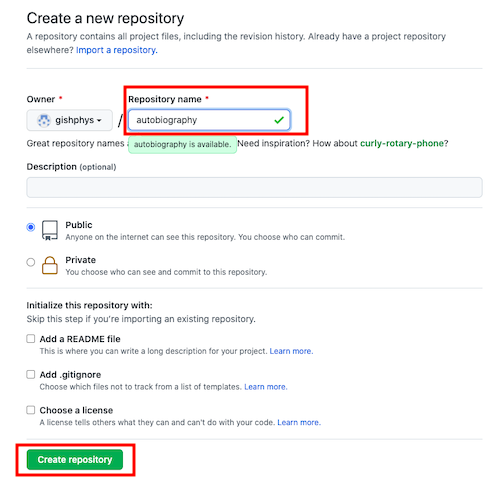
Step2、為此儲存空間命名,其會在網址後方出現,因此可以取和此網頁相關的名稱,如要做一個自傳的網頁,名稱可輸入autobiography。
輸入完成後,點擊下方Create Repositoriy。
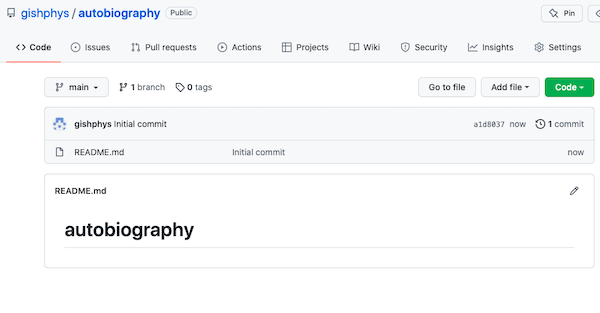
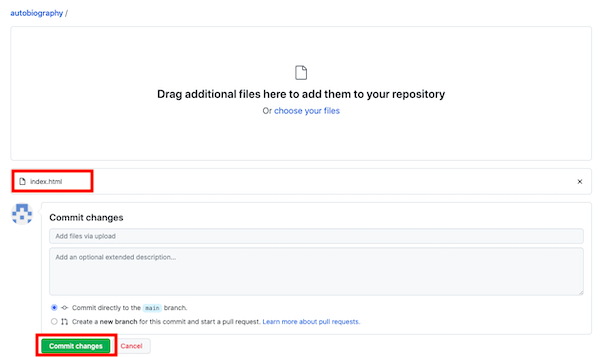
Step3、此時已建立網頁的儲存區,將撰寫好的index.html檔案拖曳進來。
Step、4index.html檔案拖曳進來後,確認檔案無誤,即可按下方Commit changes上傳檔案至儲存區。
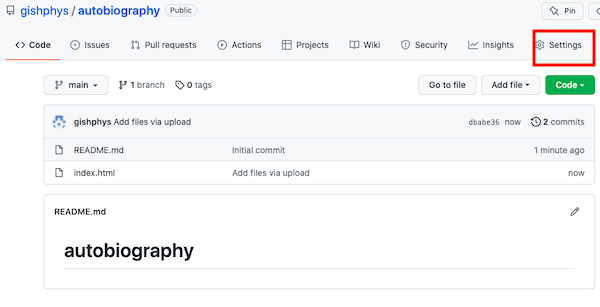
Step5、上傳後,網頁會回到儲存區的資料夾,雖然網頁已上傳上來,但網站尚未發布,因此要點擊右上方的Setting做相關設定。
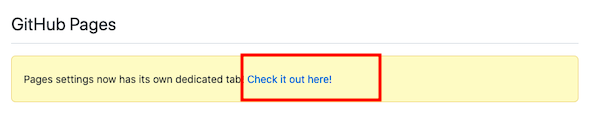
Step6、進入Setting後,往下滑,找到如下圖的GitHub Pags,點擊下方的Check it out here!進行設定。
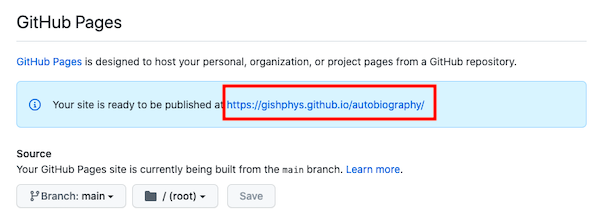
Step7、進入GitHub Pags編輯區後,將Source從None改成main,並按save進行儲存。

Step8、此時上方會跳出網址,此即為網頁的連結,透過此連結將可從線上隨時看到你的網頁內容,如下:
https://gishphys.github.io/autobiography/